Creating Blackboard Announcements
You can use Blackboard announcements to share information, with (staff and students) who are registered on the chosen Blackboard space.
- Check that Edit Mode is set to ON. If Edit Mode is off click to toggle from OFF to ON.

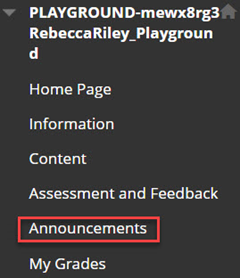
- In the menu panel on the left-hand side in Blackboard, scroll down. For course unit spaces choose Course Management>CourseTools>Announcements. For community spaces choose Organisation Management>Organisation Tools>Announcements.
- Under Course Tools, choose Announcements.
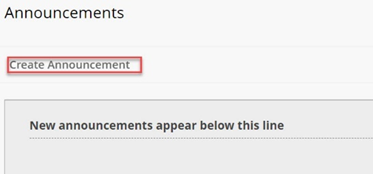
- In the Announcements window choose Create Announcement
Announcement settings
- In the Create Announcement window enter information as follows:
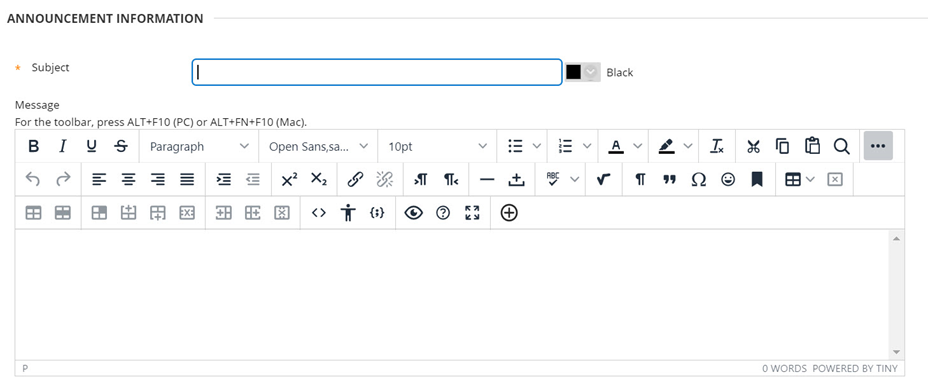
Announcement information:
- Enter a Subject (ideally, this should be short and meaningful, so that your audience quickly understand what the message will be about)
- Next enter your message into the text field.
You can use the menu options in the message field to format text, insert hyperlinks etc.
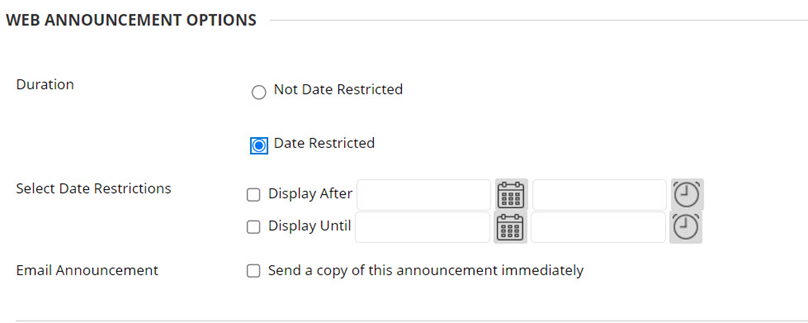
- In the Web Announcement Options section choose the duration you would like your message to be available. Posts will be shown in date order, with the most recent at the top.
- Not Date Restricted: .
- The announcement will remain in the Blackboard space unless it is deleted
- Date Restricted:
- Once this item is checked, further options will appear (see image below). Use the calendar and clock icons to choose the date and time that an announcement will be available.
- Email announcement:
- Tick the Send a copy of this announcement immediately box to email a copy of the message to staff and student enrolled on the Blackboard space.
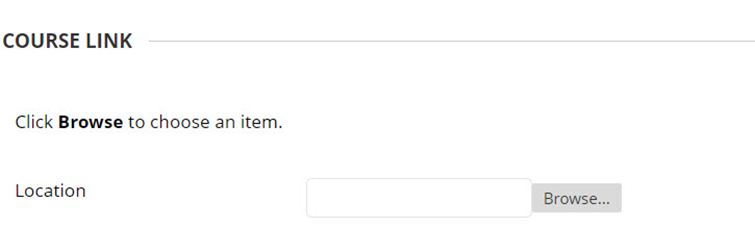
- Course link: It is optional to link to ‘content’ (e.g. content folder, item, file) as part of your announcement. To create a course link, use the browse button to view a list of content. Choose which content you wish to link to from the list.
- Once content has been selected a url link will show in the Location field.
- Next choose Submit.
You should now see the Announcements window, with the most recent post displayed at the top. If you have chosen to send a copy by email, you should also receive a copy of the announcement to your inbox.
In the example below, Test announcement 2 is ‘future dated’ (the Display After date) has not passed yet, therefore, the status is Item is not available.

How do I edit or delete an announcement?
- Ensure Edit Mode is switched ON in the Blackboard spac.e
- In the left hand menu panel navigate to Control Panel>Announcements and choose Announcements.
- In the Announcements window, locate the relevant post and then click on the grey chevron next to the announcement title to reveal the Edit / Delete menu options.
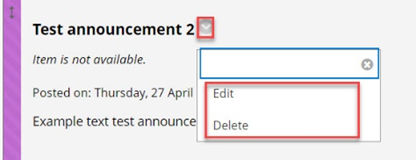
- Choose Edit if you wish to make changes to the post and then choose Submit once done to update the post.
- If you wish to delete instead, then use choose the Delete option. A popup window will appear. Choose OK to delete the post or Cancel if you want to keep the post.
How do students access announcements in Blackboard.
Students can access announcements via:
- The Home Page andor
- A menu link (if one has been created).
Accessing announcements via Home page
Within the Home page students should see a My Announcements area. Students can click on more announcements… to reveal a list of posts. Students can then click on the relevant post title to view the annoucement.

Accessing announcements via a menu link
In some Blackboard spaces, staff may have chosen to set up a Tool link, which students click on from the Blackboard menu to access the Announcements page. Students can click on the menu link to go to the announcements page.


