peerScholar – Managing activities

peerScholar is a powerful tool which can be used for peer evaluation. If you’re new to peerScholar we recommend checking out the following articles first:
- peerScholar Overview (to find out what the tool does and the types of peer evaluation workflow that you can build)
- peerScholar Get started (Blackboard) (which will walk you through how to create a Peer Scholar activity in your course unit and build your activity within Peer Scholar).
This article provides an overview of the different menu options available to help you manage your activity within peerScholar. You can find student facing guidance in this post peerScholar: Student Guide.
Accessing peerScholar
Open the relevant assignment link within your course unit space to access peerScholar. If the peerScholar dashboard does not open straight away, choose Activities and then select Manage under the relevant activity.
Understanding the peerScholar Dashboard
peerScholar has a series of side menu options:
- Activities is the key menu area to choose, where you can access the majority of settings required to manage your activity. (Overview, Student Progress and Grading).
- Students and Teaching Team menus enable you to see the students and staff on your unit, when they last accessed the activity and an LMS Sync option, should you need to resync members between your course space and PeerScholar
- Gradebook shows a list of students / email addresses and overall grades. You can also download a CSV file of data and Sync Grades
- History access an overview of actions within the space.
To jump to a specific section use the quick links below:
- Overview Menu
- Edit settings
- Data reporting
- Instructor Grading
- Activity Schedule (controlling dates each phase is open)
- Activity Completion (high level overview)
- Student Progress and Grading (key area for monitoring progress and who is reviewing who)
- Posting Grades to your course unit
How do I show / hide a peerScholar activity from student view?

For an activity to be visible to students the following two steps must be taken:
- Show Activity must be enabled in Peer Scholar (this setting is found under Activities>Overview).
- The link created within your course unit space must be published/visible to students.
- If you need to hide an activity, then hide/unpublish the link within your course unit space.
Overview
In the overview menu staff can:
- Preview: access a quick at a glance preview of the student view for each stage of your activity.
- Delete the activity (if required).
- Edit which effectively takes you back into the build phase of the activity.
- Data access various reporting options to produce CSV reports.

Edit activity settings
Choosing Overview>Edit effectively takes you back into the ‘build’ phase where you can check / change activity settings.

- Build Activity – Here you can edit:
- The instructions your students see before starting each phase.
- The settings which control your workflow.
- The rubrics which students see during the assessment / reflection phases.
- The number of peers / groups which a student needs to review during the activity.
- Set Dates: These dates control when each activity phase will be open to students. (The option to edit dates or manually open / close phases is also available under Overview>Activity Schedule>Edit Dates).
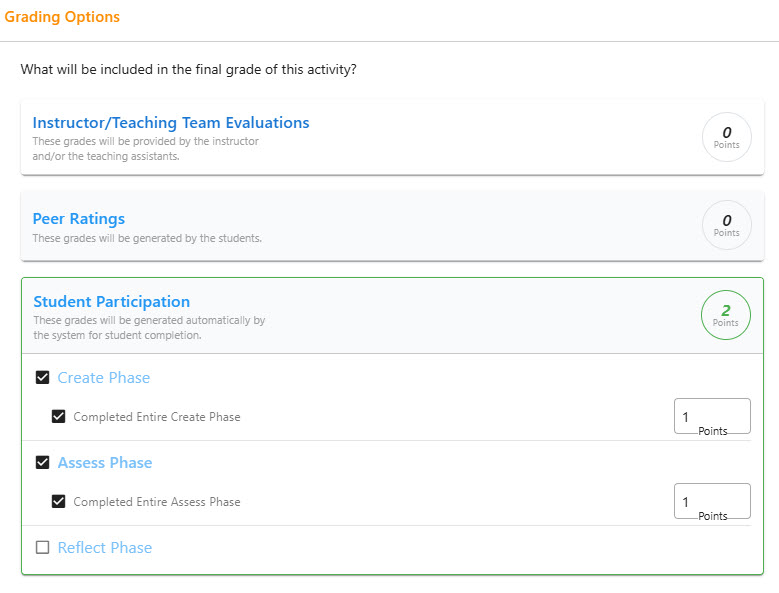
- Customise Grading: Where you can check / edit:
- Instructor/Teaching Team Evaluations the rubric items which staff complete if instructor marking is required within Peer Scholar.
- Peer Ratings these determine which scored elements from the peer assessment and reflection phases contribute to the overall mark.
- Participation set a score which is awarded to students simply for completing the activity.
- Assign Grading can be used to randomly or manually assign staff to submissions (if instructor marking is taking place in Peer Scholar).
Depending on your activity type under Overview>Edit you can also:
- Manage Groups for Team Work & Group activities. For example check / edit which students are in which groups.
- Setup Cases for Case Study activities. For example determine how many cases the activity has and how students are allocated to review cases.
Data reporting
The Overview>Data menu allows you to access and download various reports. The data you generate will depend on the filters that you apply. Peer Scholar does not contain University of Manchester student IDs. Depending on the report requested, the unique identifier used will usually be student name, email address or group number. Therefore, if you wish to download and adjust grades manually outside of Peer Scholar, then additional work is required to get the data into a format that can be uploaded into Blackboard Gradecentre.
Note: For large cohorts, it can take a few minutes for Peer Scholar to generate reports.
Below is a brief overview of the types of information that the reports can contain.
- Groups contains student name, student email and group numbers.
- Grades reports can contain student email, student name, instructor name, instructor grade, peer overall grade, averaged peer grades for each scored assessment item.
- Ratings can contain the name of the group giving feedback, the name of the target group and a summary of comments and scores given to the target group in the assessment phase.
Instructor Grading
Staff can access and mark work from a panel on the Overview screen. The instructor grading panel is not labelled specifically, but looks similar to the image below and contains the options Show Grades, Edit Grading and Grade Now.
If you are considering completing instructor grading within Peer Scholar, we recommend booking a one-to-one with the eLearning team to see what the instructor process looks like, before setting up an activity for your students.
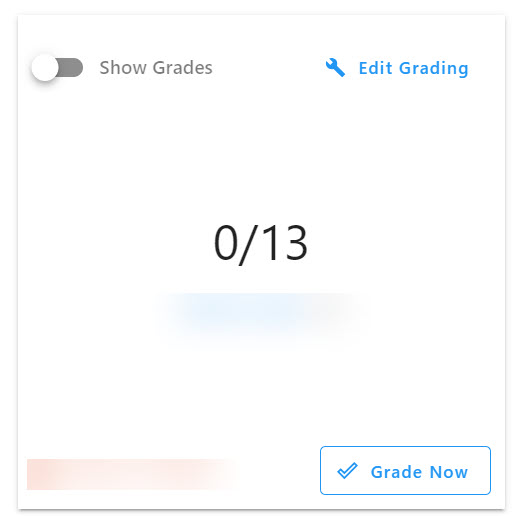
Show Grades: When toggled on this releases grades / feedback to students in Peer Scholar.
Edit Grading: Takes you to the Customise Grading section.
Grade Now: Opens the instructor marking view for staff who need to mark in Peer Scholar.
Activity Schedule
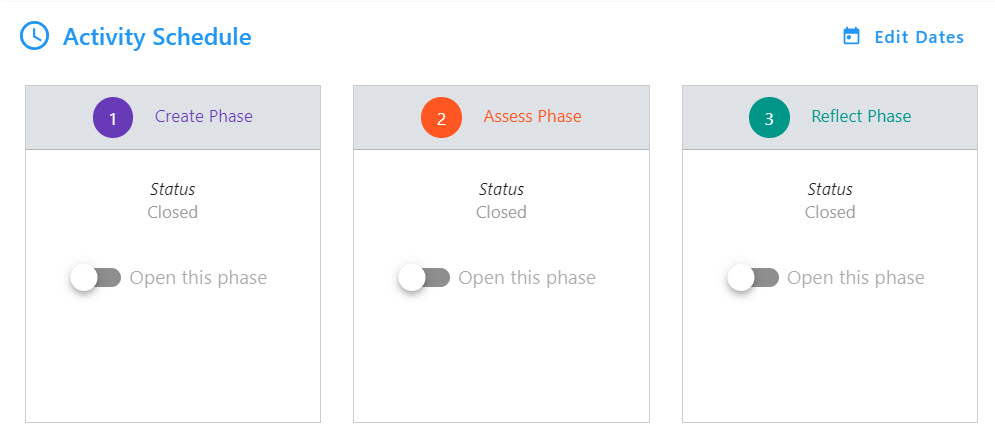
Under Overview>Activity Schedule you can either set dates / times when each activity phase opens to your students via Edit Dates or manually open and close these phases by using the slider bar next to Open this phase.
Activity Completion
Under Overview>Activity Completion you will see a quick visual snapshot of how many students have completed each activity phase.
Student Progress and Grading
The Student Progress and Grading section provides an overview of the peers / groups undertaking the activity and their progress for each stage (Create, Assess, Reflect). You can also access instructor grading via Grade Now, in this section.

Within the Student Progress and Grading section you can:
- Click on the status for a phase to reveal further options (such as Allow Late Access for the selected peer / group on that stage).
- Click on the vertical three dot menu icon to reveal further options such as downloading file attachments (eg. student submissions from the Create phase).
- Manage Groups view and move students between groups. (This can also be done via Overview>Edit>Manage Groups).
- View Distribution – see and edit which peers / groups have been assigned to review each other.
Student Progress and Grading>View Distribution
Choosing View Distribution allows you to to see a snapshot of which who is reviewing who. You can switch between the views Giving Feedback To and Receiving Feedback From.
Note: Treat the data shown here with caution. When a student clicks peers/groups within the assess phase, the number of reviews given/received changes. However, in practice this does not always mean that the student has fully completed each review. Once a peer/group has completed and submitted all of their allocated reviews the assess phase should show as Complete.

In the View Distribution section you can also:
- Download a CSV file with a summary of the data shown.
- Use the looking glass icon to search for a peer or group by name.
- The three people icon can be used to allow you to manually edit who is reviewing who. Note: If the assessment phase is already in progress, changing allocations could result in loss of data already input.
Posting grades to your course unit
You can specify what scored peer assessment elements contribute to the overall grade via the Customise Grading section. (The Customise Grading screen can be reached via Overview>Edit or Overview >Edit Grading.
The settings within the Customise grading area dictate which scored elements of your activity (eg. peer grading, teacher grading and participation scores) contribute to the overall mark.
To sync the overall grade to your course unit, within peerScholar go to the Gradebook and choose Sync Grades.
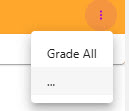
If the overall grade is not showing within Gradebook, go to Overview>Grade Now to open the Instructor grading panel. In the orange menu bar across the top of the screen click on the elipsis in the top right corner and choose Grade All. A pop up notification will appear, choose Continue (this action will push grades to the Gradebook in Peer Scholar).
